
Before you import your records, make sure you've created your teams in TeamsID. That way, when you import your records, those records will be mapped to their respective teams.
After you've created your teams, you're ready to create your import CSV file. Download and open our sample CSV file to get started.
Do not change the existing column headers in the sample CSV file.
Column A (description) represents your records description or name. For example, Facebook, Google Analytics, Linkedin for Business, Marketo, etc.

Column B (note) represents any notes you might like to include for your records.

Column C,D,E (Team1, Team2, Team3) represents the teams a record should be added to. For example, Marketing, Accounting, Executive, HR, etc. Make sure the team names match the teams you've created in TeamsID

In the sample CSV file, you will notice there are 3 teams: Team A, Team B, Team C
Replace those team names with the respective teams you've created in TeamsID
There are 2 records: Record A, Record B
After the import (refresh after import), you will see Record A and Record B have imported into TeamsID and are available to the teams as specified in the CSV.

Start by clicking on the settings icon next to your organization's logo on the far left column of your TeamsID dashboard. Once clicked, you'll be sent to your Organization Settings. Click on the Export/Import tab.
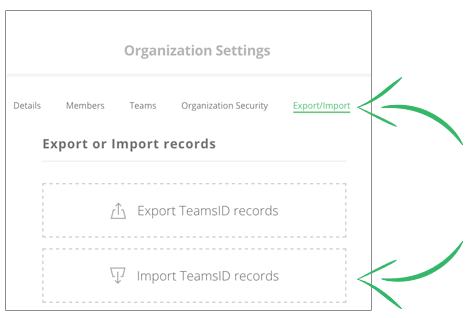
From here you can import a CSV file by creating a CSV in our predefined format. Here is the sample CSV that imports directly into TeamsID – Download
- In the sample, you will notice there are 4 teams: Team A, Team B, Team C, Team D
- There are 2 records: Record A, Record B
- After the import (refresh after import), you will see Record A and Record B have imported into TeamsID and are available to the teams as specified in the CSV.
For security, you should delete the CSV file after import is successfully done.